Showing posts with label Tutorial. Show all posts

Saturday, 12 October 2013

Christmas workshop Tutorial- Perfect fabric for Tilda doll and angel skin

As I have promised I will be sharing tutorials and DIY tips in the next coming weeks part of my Christmas Workshop. This if the first one. I love making dolls and angels but it is so hard to get hold of the suitable material to use for the dolls skin. Where I live this the fabric that runs out so quickly I hardly manage to get my hands on it. I have experimented for a while and now want to share the best method I came up with for a nice neutral color and an even finish.

Buy some cotton fabric either in white or in any neutral color. I tend to use Ikea's BUMOL most of the times. I did try other fabrics but this is the most suitable for me.

Take a pan  that you don't use anymore for cooking or any in expensive pan.Soak the fabric in cold water until nice and wet.


 Add in the ingredients for coloring. I tend to use natural aids like coffee, chestnuts and  tea but you can use any of the above. I put a good handful of chestnuts, 2 tb of coffee in a filter so it does not get in the fabric into the water. Filters I use are also available form IKEA. If I want to have a skin tone which is a bit more tanned I add 3-4 Earl grey teabags any type will do.


 When all ingredients are in and the clothe is nicely soaked through. I switch on the hob and cook it  for an hour.

After an hour I just leave it to cool and  when it is cold enough I hang the colored fabric outside to dry.


And this is what you get. A perfect natural tone for doll skin.

I hope I gave you a nice enough tutorial!In the rare occasions in which I get these kind of lucky inspirations I am very happy to share them with you!I hope you will try it with your Christmas decorations or any other  crafts you might be working on as I think this idea, can be recycled for every occasion.

Wednesday, 13 February 2013

Pencil Holder from Household Can -Tutorial

 I have made this  small project over the weekend. I used a fruit can. We had all the fruit for lunch the day before and the size and shape was perfect for my pencils. After washing and drying I just covered it with fabric and it all turned out really well. So well that I thought that I will share it here in pictures. Hope that it will inspire you to have a turn and make your own. If you do please share it in the comments with a link!!!Happy stitching!! Click on the pictures to enlarge.


 The embroidered word means pencils in Hungarian, but you can embroider anything on the felt.


Tuesday, 13 November 2012

Clay Christmas Decorations


I love white especially at winter. Reminds me of the endless fields of white snow where we used to play in the winter time when we small. I love to use this color to decorate at Christmas too especially mixed with red. Blunt and simple.
I have seen a lot of variety of the clay decorations for Christmas. I have tried making them of clay I bought at hobby shop but it was not the best I have to say. I have found a lovely recipe for the clay which I tried and worked perfectly for me.
It is fairly simple and does not require a lot of preparing.

 {Inspiration from Google pictures}

Clay Christmas Decorations

1/2 cup cornstarch
1 cup baking soda
3/4 cup water

Making Clay
In a medium sized pan combine the cornstarch, baking soda, and water. Put it on the hob and stir the mixture over medium-low heat. After a couple of minutes, the mixture will begin to thicken when it has a smooth texture remove from heat. Spoon the dough into a bowl and cover it with a damp cloth until it's cool. When it's cool, knead it on a smooth surface, adding a little more cornstarch if it feels sticky.

Rolling, cutting, and baking

Preheat oven to 175 degrees. Line baking sheet with parchment paper. Roll out clay to 1/4 inch thick on a surface lightly dusted with cornstarch. Use cookie cutters to cut out shapes. Transfer shapes to baking sheet. Poke a hole in the center top of each decoration. Place them in the oven at 175 degrees for about an hour, turning them over halfway through cooking.

Decorate them and thread a piece of ribbon, twine or yarn through the holes.You can also use rubber stamps to add a bit of color. Best used on trees but I love to put it inside cards that I send out or hand over to friends.it is also perfect on presents, like boxes or vine.This year I will be using it as an advent calendar stocking stuffer.

Friday, 9 November 2012

Advent Cross Stitch Projects


I was going through some of my old magazines and found these beautiful projects.I usually not that drawn to cross stitching as it takes quite a lot of time for the  images to form but these are really neat and so easy to make. You will fly through and not realize that you are stitching.
 I have photographed two projects from the magazine for you one is a fabric framed NOEL bunting which is made by using heavy paper and fabric. The other one is actually not one but two small  Christmas themed illustrations to use with cards or ornaments. All color codes are supplied below. Happy stitching!


 Noel Bunting

A hint: Do the letters first with generous spacing and make the frame accordingly to fit the size.


 Ornaments and Cards


Thursday, 30 August 2012

Easy Bath Bombs


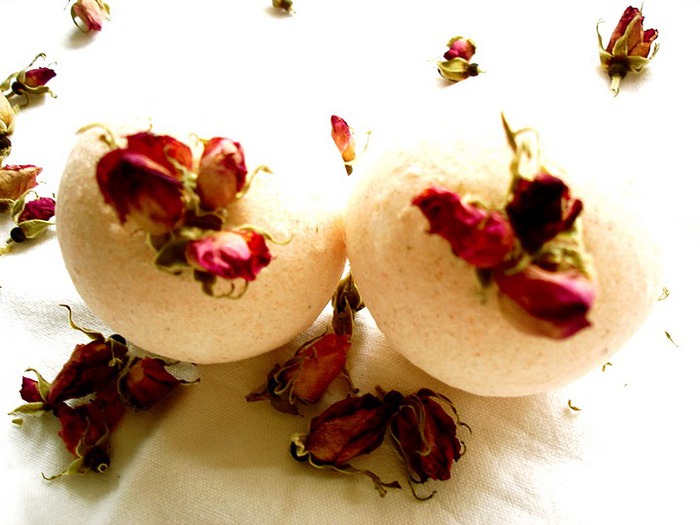
4278666_DSC03804 (700x525, 80Kb)

Now that we have a real bath at home I can perfect my skills of bath bomb making. I know that there are a hundred recipes floating around the net, but I often find them unsafe or just too complicated to make.

 I want to share one that is tested and definitely works even for sensitive skin. I have extremely sensitive skin and it was tested on me.
It is all made extremely simple but I actually find the outcome slightly better than bombs from the store.

Ingredients

4 tbsp. tablespoons of baking soda;
2 tbsp. spoon of citric acid;
3 tbsp. dry milk / or corn starch
1 tbsp. teaspoon sea salt;
1 tbsp. spoon of magnesium sulfate (also known as Epsom salts, also known as magnesium), buy over the counter  if I cannot get it I use rock salt.
20 drops of olive oil /or if you fancy essential oil

Just a brief note on oils:
To de-stress and relax - use orange oil, bergamot, basil, grapefruit, geranium, lavender, lemon balm, rose, rosemary or sage.
To create a romantic mood take the oil of jasmine, ylang-ylang, ginger, patchouli, cardamom, cinnamon, juniper, neroli, sandalwood or thyme.

You can also use food dyes or spices, fine grass or flowers, chocolate, cocoa, honey, bran, oat flour etc.

For molding:
There are special moulds available in hobby shops but you can also use any silicone molds for biscuits and cakes, yogurt cups, halved tennis balls


You will also need a container for mixing the ingredients;  and a pair of rubber gloves


Preparation:

Put your gloves on. I like to use them as they make life much more easier and stops sweat getting into the balls from your hands. To start mix the baking soda and lemon juice, if possible, try to grind these components, as can be smaller. (Citric acid interaction with fizzy soda gives the desired effect) Now add the milk powder and thoroughly stir again add salt, oils and dyes .

Stir until smooth.

If the resulting mixture is wet enough, start making balls - by filling the molds with the mixture. If the mixture is dry - add a little water. But be careful: if the mixture begins to sizzle - so water is enough.

If you use molds, grease them with olive oil and fill them with the mix and leave for 1 hour in a dry place. Take out the bombs from the mold and leave to dry 24 hours, so that they can mature by a better bonding of all components.

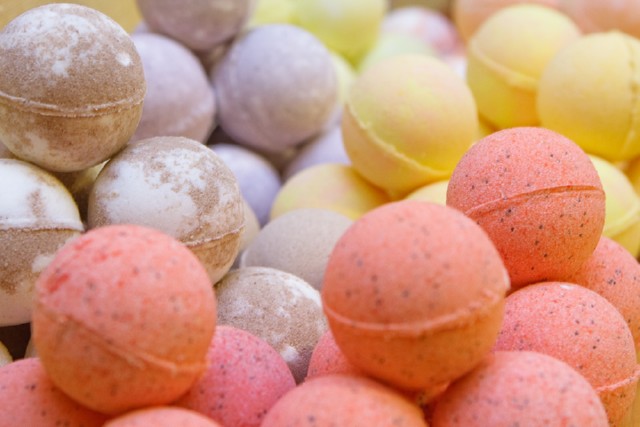
To make bombs colored ready-mix should be divided into two (or more) pieces and add dyes. Put in only 1-2 drops!


4278666_mg5473enl (640x427, 79Kb)

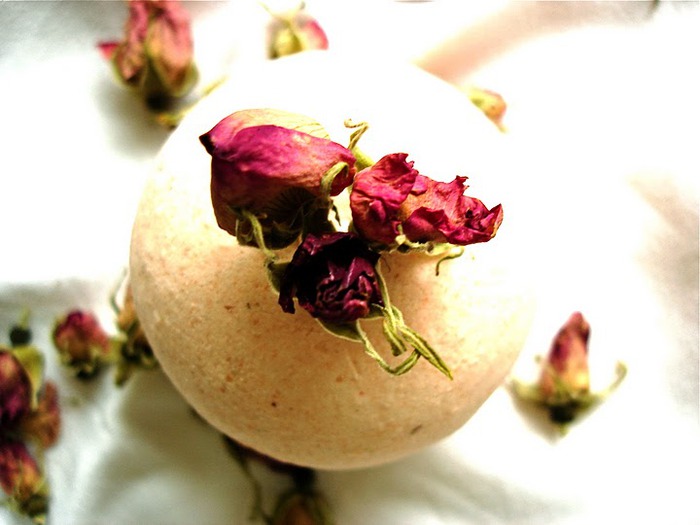
I actually like to put in ground cinnamon or coffee, lavender, rose hips or petals and buds that I have collected in the garden. I also use some fairy dust (LOL) especially at Christmas time. This adds a lot of sparkle to the season.

That's it, you can safely take a bath and enjoy the bombs. It's also a nice gift for friends and family. For children prepare a bomb with a surprise inside. This can be any small action figure, big pearl or gem or anything else that come to mind. To do this, during the molding of bombs put the "surprise" in the middle of the composition.

4278666_DSC03797_2 (700x525, 66Kb)

Sunday, 8 January 2012

Vintage Button Heart Tutorial

I have received some really beautiful vintage buttons some time earlier from my granny Magdalene. She has been collecting them now for years.When I visited her I brought some of the buttons back (as she had so much with her that I was unable to take all). There were a lot of white buttons. Some of the new or newish some of them a bit worn.I don’t really mind that time gives a lot of character to things. I had  been thinking for a while what to do with them but had the best idea form my favorite magazine  Country Homes and Interiors. A wire frame button heart.So I set to make it on Sunday.I put out all the buttons I want to use in a heart shape. I got a simple gardening wire and formed a heart out of it leaving a small hook on the top.Than I attached the buttons one by one using a thin wire. This looked quite neat but I wanted it to look like as it was sewn on so I got a needle and some white thread and sewn through the button holes all the way around, this gave some extra firmness to the buttons as well. Although I was a bit afraid that it won't work well the whole thing came up really well at the end. I love it an cannot stop looking at it!!


IMG_0095
{White button heart}

Monday, 5 December 2011

Mini Hat Advent Calendar Tutorial

I have posted some ideas before for Advent Calendars here is a tutorial for one which is the most adorable the mini hat calendar. You can give this a go even if you have not ever casted a stitch!! It is extremely easy and can be done in an afternoon.

What you will need:

  • Festive colored wool (enough for 24 hats)
  • Yarn
  • Scissors
  • 4mm knitting needles 
  • Ribbon or brown rope for hanging

Instructions:
{Beginners guide}

Make a nice cup of tea and curl up by the fireplace.
Cast on 28 stitches using double knitting yarn.
To start knit two rows or for a rib knit 1 purl 1.
Than starting with a knit row work in stocking stitch for 12 rows.
When you are ready for the next row knit two together to the end.
When ready cut off the thread leaving an approximately 30 cm long thread.
Cut the end of the line through a sewing needle than run it through the loops to remove the sewing needle.
Sew down  to finish the hat to make it more cute sew a small bobble on the top.
When you are ready with the hats hang them with a small bit of leftover yarn and hang your hats. Don't forget to fill them with sweets and for the healthier option nuts and dries fruits!!!!


♥♥♥
---------------------------------------------------------------------------------------------------------------